Getting started with Shio
Four short steps. About a minute. Shio asks you to install nothing of our own on your Mac.
A few short steps on your iPhone, and one quick visit to your Mac.
Shio is the iPhone app. Your Mac doesn't need Shio installed — it just needs to be reachable on Tailscale and willing to accept SSH connections from your iPhone.
Every step below uses an existing trusted tool: Tailscale's signed installer, Apple's System Settings, your Mac's Terminal, and (optionally) Homebrew.
New to the terminal? Step 3 below is gentler if you've done a five-minute primer first. shio.sh/learn →
step 1 install tailscale
Open tailscale.com/download on your Mac. Run the installer. Sign in with Google, Apple, Microsoft, or GitHub.
Use the same account you'll use on your iPhone. That's how Tailscale knows the two devices belong to the same private network.
Once installed, you'll see a small Tailscale icon in your menu bar showing Connected.
step 2 enable remote login
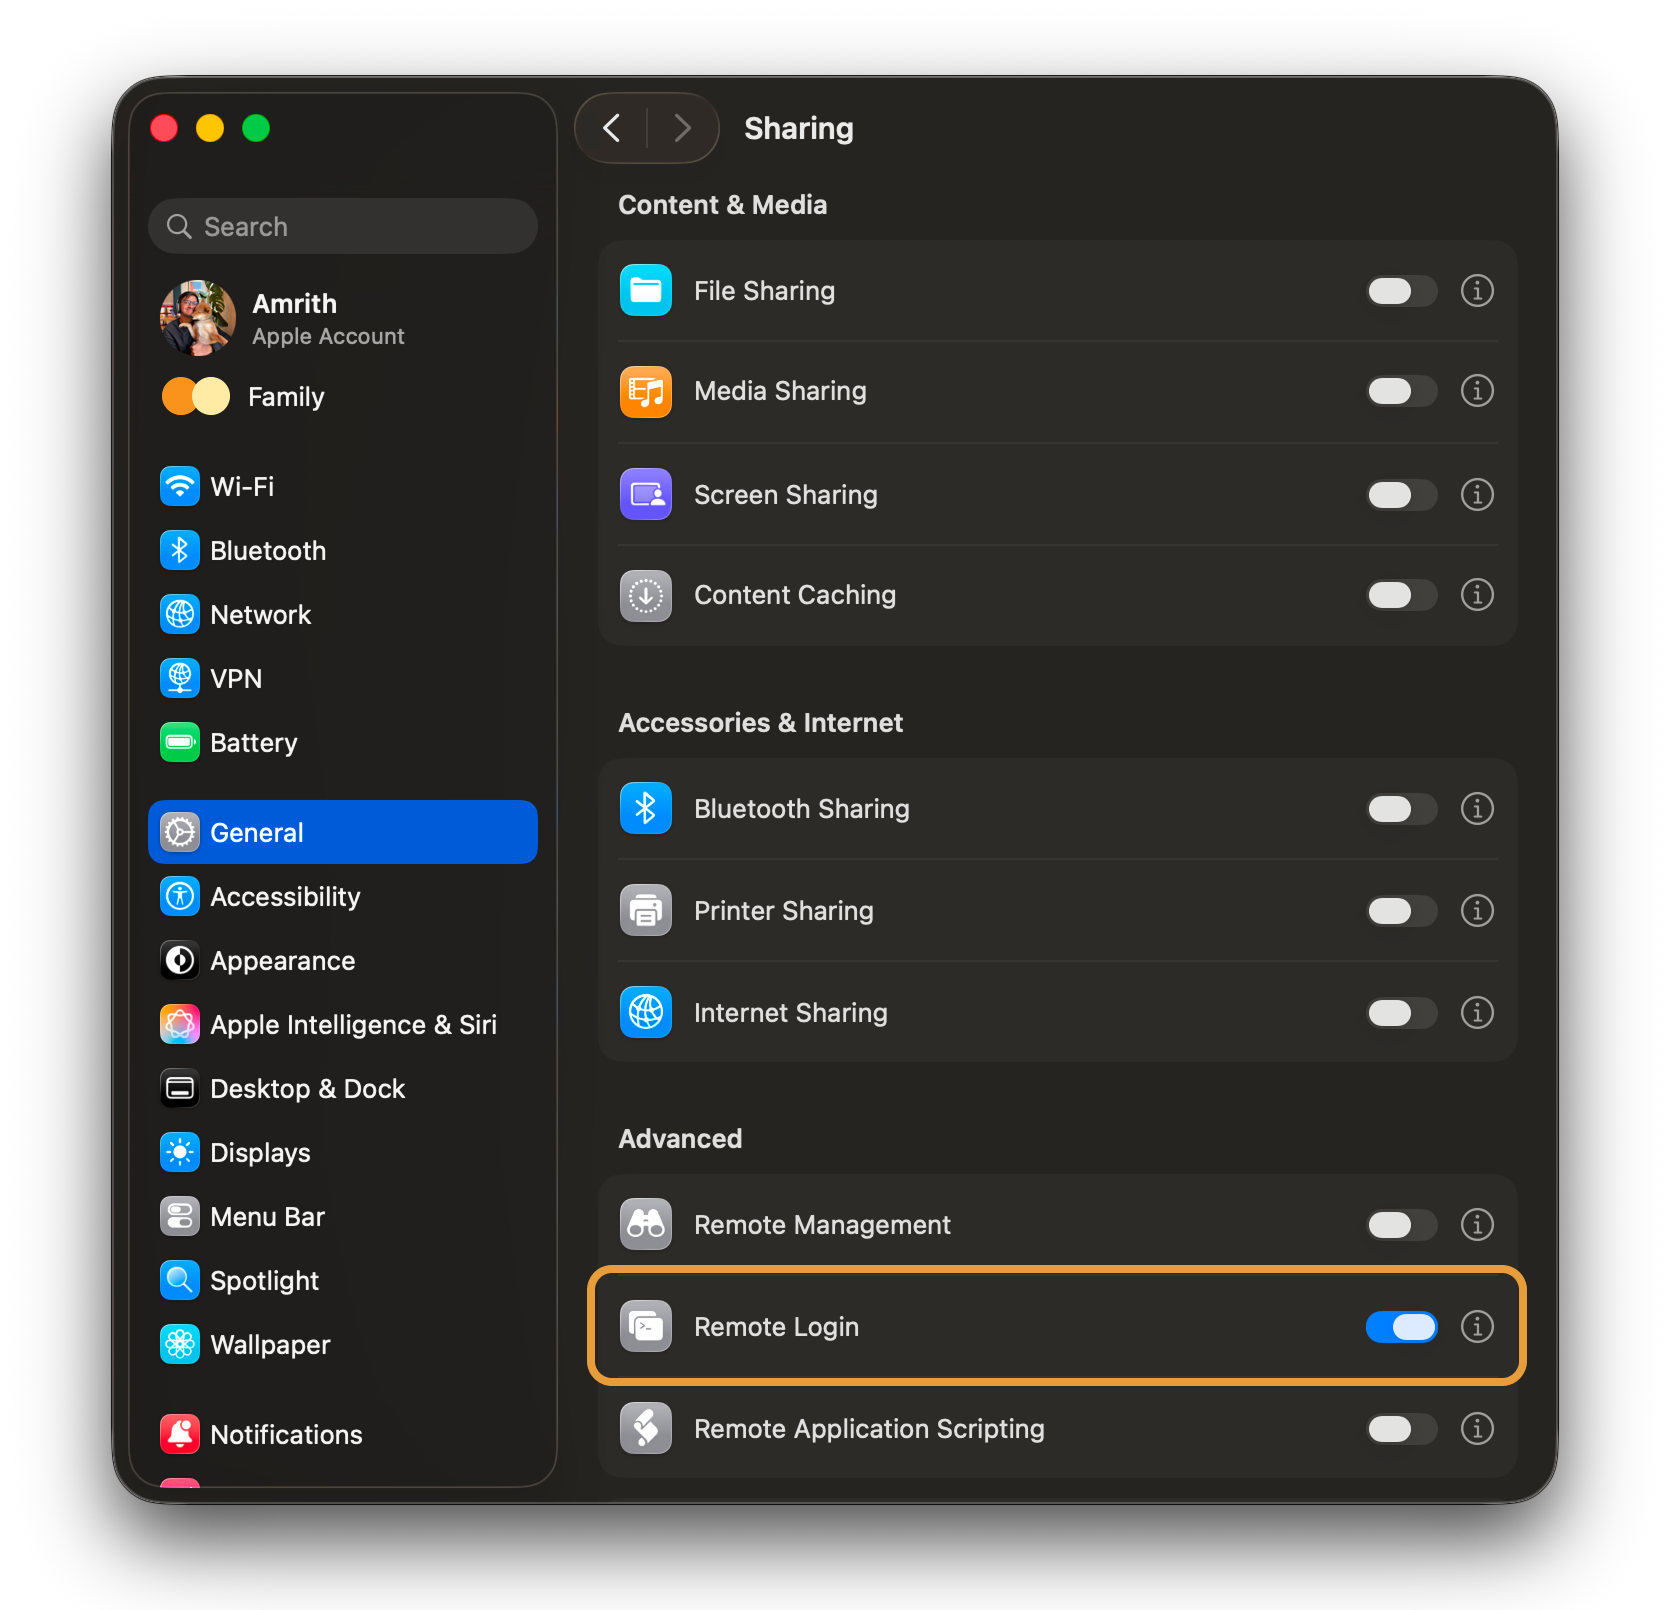
Open System Settings on your Mac. Navigate to General → Sharing. Turn Remote Login on.
Under "Allow access for", make sure your user account is included (or "All users").
Remote Login is what starts the SSH server on your Mac. Without it, your Mac refuses connection requests on port 22 — even with the right key, even with Tailscale humming along perfectly. macOS doesn't ship with this on by default, and only you can turn it on (no app can do it for you, and rightly so).
step 3 install shio's public key
Each Shio install generates its own SSH keypair stored on your iPhone. To let it sign into a Mac, that Mac needs to know the public half.
On your iPhone:
- Open Shio
- Go to Settings → SSH Key
- Tap Copy install command
On your Mac, open Terminal and paste. Hit enter. The line appends Shio's public key to ~/.ssh/authorized_keys safely, creating ~/.ssh if it doesn't exist and setting chmod 600 on the file.
echo 'ssh-ed25519 AAAA…' >> ~/.ssh/authorized_keysShio shows you the real command with your actual public key. Copy it from there, not from here.
That's all. No restart, no service to reload.
step 4 install tmux
This step is optional. Shio works without it; sessions just don't persist between reconnects when tmux isn't present.
With tmux installed, when you close Shio and come back, you land in the exact same shell state: same working directory, same running command, same scrollback. Without it, each reconnect starts a fresh shell.
If you already use Homebrew, it's one line:
brew install tmuxIf you don't have Homebrew, you don't need it just for this. Shio's perfectly happy with plain SSH. Install Homebrew + tmux later if you decide you want session persistence.
A nice quirk: you can install tmux from inside Shio's first SSH session. Connect, run brew install tmux at the prompt, disconnect, reconnect — your next session will auto-resume.
Back on your iPhone, in Shio: add your Mac and tap to connect. If anything doesn't work, Shio's built-in Diagnose (Settings → Diagnose, or the Diagnose button on a disconnect overlay) tells you exactly which step is incomplete and what to do next.
a one-tap install someday
We're working toward shipping a small CLI helper through Homebrew's official formulas that collapses these four steps into one command. That requires earning Homebrew's notability threshold first, which we'll do once Shio is shipping with real users. Until then, the guide above is the path — and honestly, it's not bad.
Shio runs on your iPhone, but it talks to a Mac. Two devices, one private network, one SSH key.
If your Mac isn't set up yet, open shio.sh/setup on your Mac first. You'll be walked through the Mac side of this in about a minute.
step 1 install shio
Shio for iPhone and iPad is in beta via TestFlight. Get an invite from the signup on the home page, then install Shio from TestFlight.
Requires iPhone or iPad on iOS 26 or iPadOS 26.
step 2 install tailscale
Get Tailscale from the App Store. Sign in with the same account you used on your Mac.
Same account on both ends is what makes the two devices show up on the same private tailnet.
step 3 turn tailscale on
Open the Tailscale app. There's a big toggle at the top. Tap it. It turns blue and says Connected.
Then open the app's settings (your profile, top-left) and turn on Use Tailscale DNS. Without this, your Mac's tailnet name won't resolve.
step 4 copy shio's public key to your mac
In Shio: Settings → SSH Key → Copy install command. Paste that line into Terminal on your Mac and hit enter. It appends Shio's public key to ~/.ssh/authorized_keys safely.
step 5 add your mac
Back in Shio's main screen, tap + Add Mac. Shio finds your Mac through Tailscale's MagicDNS. Pick it from the list. Tap to connect.
On a fresh tailnet, your Mac usually appears within a couple of seconds. If it doesn't, the next section is for you.
if it doesn't connect run diagnose
Shio ships with a built-in Diagnose that walks the four things that have to be true for SSH to work. Open it from Settings → Diagnose, or from the Diagnose button that appears on a disconnect overlay.
The four checks, in order:
- tailscale app installed→ probes the Tailscale iOS URL scheme
- tailscale vpn connected→ TCPs
100.100.100.100:53; only reachable when the tunnel is up - tailscale dns resolving→ confirms Use Tailscale DNS is on
- your mac is reachable→ TCPs
your-mac:22; distinguishes asleep / DNS / Remote Login off
Each row tells you what to do next. The wording matches the exact failure mode, not a generic "something went wrong." If a row is yellow, tap the action it suggests and re-run.